
How to Measure Dorsiflexion: A Practical Guide for Clinicians
Team Meloq
Author
To measure dorsiflexion accurately, you are assessing the angle between the foot and the shin as the toes pull up toward the knee. This can be captured with a functional Weight-Bearing Lunge Test, providing a measurement in either centimetres or degrees. Alternatively, a non-weight-bearing passive test with a goniometer can isolate the pure joint mechanics.
Why Accurate Measurement Is Non-Negotiable
Obtaining an accurate dorsiflexion measurement is fundamental to developing an effective treatment plan. This single metric provides a window into a client’s lower-body function, influencing everything from their gait pattern to their risk of future injury. It is a key piece of the clinical puzzle.
Understanding this measurement allows clinicians to connect a stiff ankle to seemingly unrelated problems. For example, research indicates that restricted dorsiflexion forces compensatory movements that can cause issues up the kinetic chain, such as knee valgus during a squat or altered walking mechanics (1). These compensations are not just inefficient; they overload joints and tissues not designed for that stress, often contributing to patellofemoral pain or even hip and low back issues.
Functional vs. Isolated Assessment
There is a critical difference between the two main ways to assess dorsiflexion, and knowing when to use each is key to a sound clinical diagnosis.
- Weight-Bearing Tests: These assessments, like the lunge test, evaluate functional dorsiflexion. They reveal the usable range of motion a person has when they are on their feet and moving under load.
- Non-Weight-Bearing Tests: These passive measurements isolate the mechanics of the talocrural (ankle) joint itself. They are excellent for determining whether a limitation stems from a true joint restriction versus a muscular or neuromuscular issue.
Choosing the right test is crucial. A client might show ample passive range on the examination table but demonstrate a major deficit during a squat. That discrepancy tells a specific story—perhaps a motor control issue or a soft tissue restriction that only manifests under load—and that story points toward a more precise intervention. This is a core principle of effective outcome measurement in practice; objective data shapes targeted treatments. You can learn more about the importance of tracking progress with our detailed guide on what is outcome measurement.
Ankle dorsiflexion is arguably one of the most important lower body movements from a functional standpoint. It occurs during all sorts of movements such as walking, running, squatting, and lunging.
Ultimately, the goal is not just to get a number. It is to interpret that number within the context of the individual's life, their goals, and their functional demands. When you master how to measure dorsiflexion reliably, you move from estimation to objective assessment. That is fundamental for unlocking ankle mobility and truly improving patient outcomes.
Mastering the Weight-Bearing Lunge Test for Functional Assessment
When you need to understand how much ankle mobility someone actually uses in their daily life, the Weight-Bearing Lunge Test (WBLT) is an excellent choice. This test moves beyond isolating the joint on a plinth and evaluates dorsiflexion in a functional, loaded position that directly translates to activities like squatting, lunging, and climbing stairs. It is a simple yet powerful tool for getting a clear picture of real-world movement capacity.
The beauty of the WBLT is its adaptability. You can perform it half-kneeling or standing, and you can get a reliable measurement with several different tools. This flexibility makes it an invaluable part of a clinician's toolkit, whether in a fully-equipped clinic or working with an athlete on the field.
Setting Up for a Valid Measurement
Consistency is essential for a reliable assessment, and the WBLT is no exception. A proper setup and clear instructions are non-negotiable for a trustworthy measurement. The goal is simple: drive the knee as far forward over the toes as possible without the heel lifting from the ground.
Start by having your patient place their foot flat on the floor, pointing straight ahead toward a wall. Ensure their second toe is aligned with the center of the heel to establish a neutral foot position. Then, ask them to slowly lunge forward, pushing their knee directly over their foot until they feel a stretch in their calf or reach their end range of motion.
This movement must be controlled. The primary instruction should always be to keep their heel firmly planted on the ground throughout the test. This is the single most common compensation and the first thing to watch for.
Spotting and Correcting Common Compensations
An inaccurate measurement can be worse than no measurement at all. The body is a master of compensation and will always find the path of least resistance, so you must be vigilant.
Keep a close eye on these common errors:
- Heel Lift: This is the most obvious red flag. The moment the heel begins to lift, the true end-range has been passed, and the measurement is invalid.
- Foot Pronation: Watch for the arch collapsing inward or the foot turning out. This is a subtle way the body tries to "create" more ankle motion by moving through the midfoot instead.
- Hip or Pelvic Shift: The patient might shift their hips to one side or rotate their pelvis to gain extra distance. Make sure their hips stay square and level throughout the lunge.
If you spot any of these, gently correct their form and have them repeat the movement. A simple verbal cue like, "Keep your heel glued to the floor," or even placing your hand on their heel can make a significant difference in the quality of the measurement.
Measurement Techniques and Tools
Once you have ensured solid form, it is time to measure. Here are three reliable methods for the WBLT.
1. The Tape Measure (Distance-to-Wall)
This is arguably the simplest and most accessible method. With the patient half-kneeling facing a wall, you measure the perpendicular distance from the tip of their longest toe to the wall when they have reached their maximum lunge with the heel down. A distance of 10–12 cm (about 4–5 inches) is a widely accepted benchmark for adequate functional mobility (2).
2. The Digital Inclinometer
For a direct angular reading, a digital inclinometer is an excellent, highly reliable choice. Place the device on the anterior aspect of the tibial shaft, just below the tibial tuberosity. After zeroing the device in the starting position, the patient lunges forward, and the inclinometer gives a direct measure of tibial inclination—a proxy for weight-bearing dorsiflexion. For clinicians looking to enhance precision, it is worth reviewing best practices for using an inclinometer for physical therapy.
3. The Standard Goniometer
While slightly less reliable for this specific test, a goniometer can still be used. Align the stationary arm with the ground, place the fulcrum over the lateral malleolus, and align the moving arm with the shaft of the fibula. It can be tricky to keep the arms aligned during a dynamic lunge, which is why other tools are often preferred for consistency.
The WBLT is incredibly effective for screening large groups, like sports teams or in busy clinics. Studies show that simple electronic inclinometers provide excellent reliability for these tests (3). For example, half-kneeling tests in healthy groups show mean values around 38.6°, while standing tests yield higher values, around 41.3° (4). These norms allow us to quickly categorise results and flag individuals who might need a closer look.
This image shows the two primary ways we can look at dorsiflexion: a functional assessment versus an isolated joint measurement.
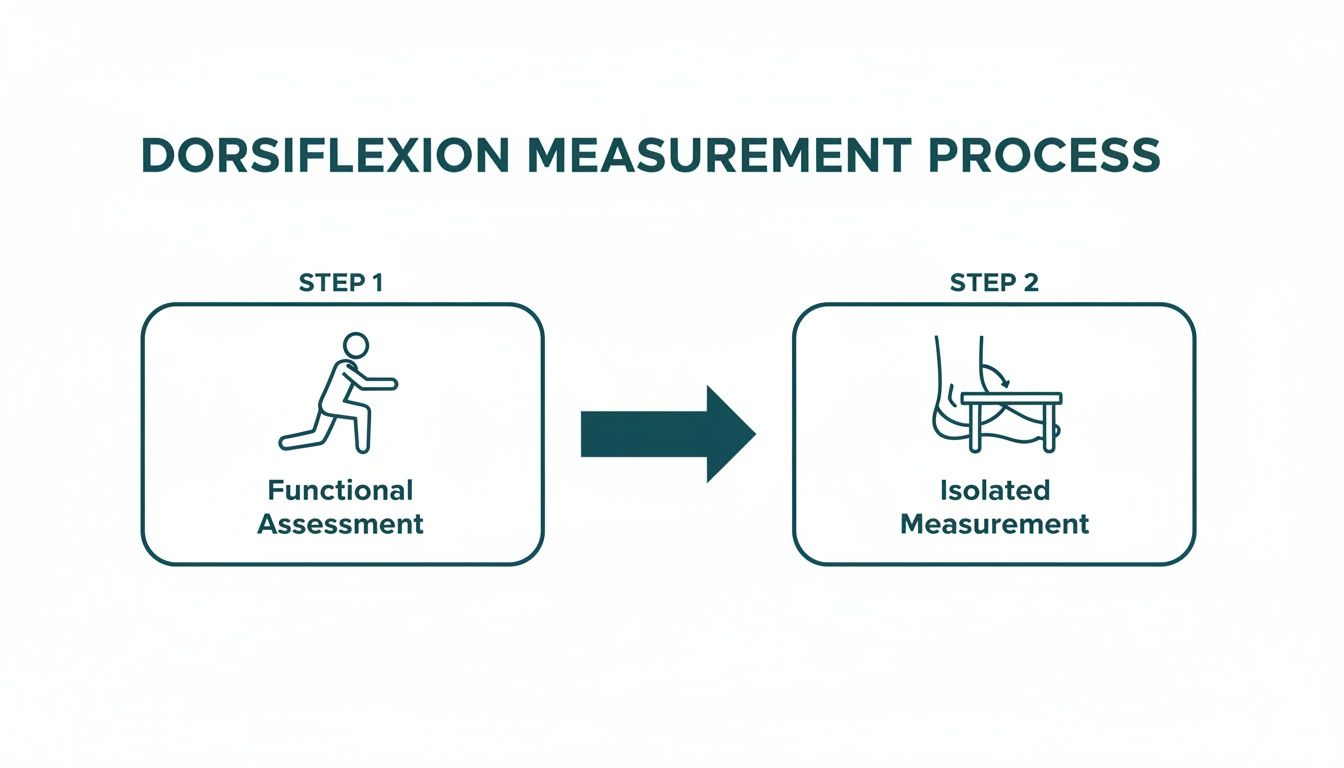
The flow from a functional lunge to a specific goniometric measurement highlights the importance of using the right test for the right clinical question.
To help you interpret your findings, here is a quick look at some normative values from the research literature for the WBLT.
Weight-Bearing Lunge Test Normative Values
| Test Position | Classification | Mean Angle (Degrees) | Source |
|---|---|---|---|
| Half-Kneeling | Healthy Adults | 38.6° | Hall et al. (2018) (4) |
| Standing | Healthy Adults | 41.3° | Hall et al. (2018) (4) |
| Half-Kneeling | At-Risk Threshold | < 33° | Gabbe et al. (2004) (5) |
| Standing | At-Risk Threshold | < 41° | Hall et al. (2018) (4) |
These numbers provide a great starting point for classifying patient mobility and identifying potential limitations that might warrant further investigation.
Validation studies have shown that the inter-rater reliability for inclinometer measures during a modified lunge is excellent (ICC = 0.95), with agreement between testers as high as 86-94% (3). These strong reliability statistics give us confidence that the numbers we use to classify athletes are both reproducible and meaningful.
Performing a Non-Weight-Bearing Dorsiflexion Assessment
While a weight-bearing lunge test shows us what a patient can do functionally, the non-weight-bearing assessment tells us what the joint is truly capable of. By taking body weight, balance, and motor control out of the equation, you get a clean, isolated look at the passive range of motion available at the talocrural joint.
This is the go-to method when a structural block is suspected as the culprit behind a movement issue.
Consider this: if a patient has significantly more range on the table than in a lunge, the focus should probably shift to motor control or strength deficits. There is no point in aggressively stretching a joint that already moves well. But if both tests show similar limitations, that is a strong clue pointing toward a capsular or soft-tissue restriction that needs to be addressed.

Differentiating Gastrocnemius and Soleus Influence
A key part of the non-weight-bearing protocol is testing the ankle in two distinct knee positions: extended and flexed. This classic manoeuvre is incredibly valuable for pinpointing which soft tissues might be restricting motion.
- Knee Extended: A straight knee puts the gastrocnemius muscle on tension since it crosses both the knee and ankle joints. If range of motion is limited here, gastrocnemius tightness is a likely contributor.
- Knee Flexed: Bending the knee to around 90 degrees puts slack in the gastrocnemius. If dorsiflexion suddenly improves, you have likely confirmed the gastrocnemius was a primary limiter. If the range is still restricted, the limitation is more likely due to the deeper soleus muscle or the joint capsule itself.
This simple, two-part test is a clinical workhorse for refining your diagnosis and ensuring your treatment targets the right structure.
Precise Goniometer Placement and Technique
Getting a reliable reading boils down to precision. Your goniometer alignment must be accurate, whether the patient is supine or sitting. For a deeper dive into this essential tool, check out our guide on what is a goniometer used for.
Here are the landmarks you need to identify every time:
- Fulcrum: Place the goniometer's center directly over the lateral malleolus.
- Stationary Arm: Align this arm with the head of the fibula, creating your reference line along the lower leg.
- Moving Arm: This arm should run parallel to the shaft of the fifth metatarsal.
Once you are aligned, apply gentle, consistent overpressure to find the ankle's maximal dorsiflexion. This helps you determine the true "end-feel"—whether it is a firm capsular block or a more elastic muscular stretch.
A critical step often missed is stabilising the subtalar joint. Always use one hand to gently lock the heel and midfoot into a neutral position, preventing any eversion or inversion. This simple action ensures you are measuring pure talocrural motion and not getting a falsely high reading from compensation.
Ensuring Reproducibility in Passive Measurements
The quest for consistent passive measurements is not new. Standardised protocols have been the backbone of reliable clinical assessment for decades. In 1991, early research established a method using applied torque and photography, reporting an impressive intraclass correlation coefficient (ICC) of 0.97—which indicates excellent reproducibility (6).
Today, technology like digital inclinometers has made precision even more accessible, helping to minimise human error. Modern studies now report minimal detectable change (MDC) values as low as 1.5°–3.9° for some devices (7). This is highly valuable for clinicians; it means we can confidently track whether our interventions are creating real, meaningful change that exceeds this margin of error.
When you are this meticulous, the numbers you record are a true reflection of joint mechanics, giving you a solid foundation for your clinical reasoning.
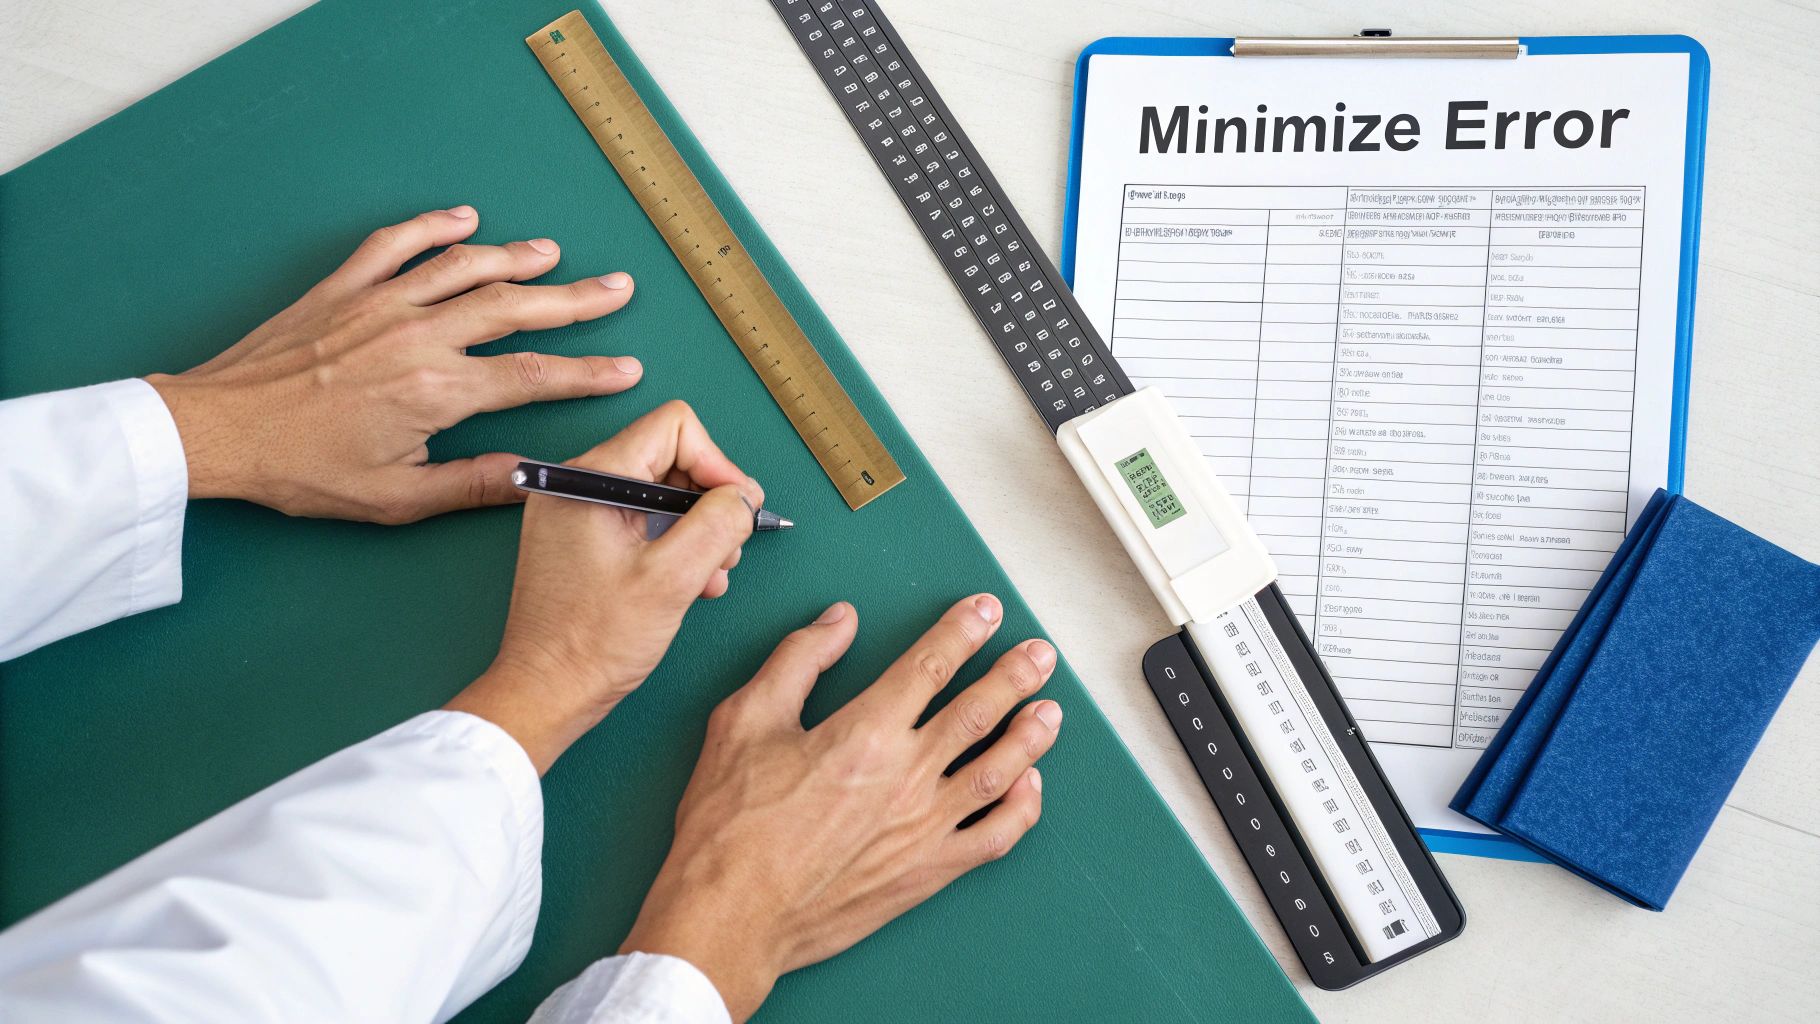
How to Minimize Error and Ensure Reliable Measurements
A measurement is only as good as its consistency. When you are tracking an athlete's progress over several weeks, you must be certain that a two-degree improvement is a genuine clinical gain, not just a variation in your technique. This is where reliability—the cornerstone of good clinical measurement—comes into play.
Achieving high inter-rater reliability (consistency between different clinicians) and intra-rater reliability (your own consistency over time) is not about being perfect. It is about being systematic. By standardising your approach, you can dramatically reduce measurement "noise" and trust that the data you collect is a true reflection of your patient's status.
Core Strategies for Consistency
Building a reliable measurement habit comes down to a few simple but non-negotiable rules. Think of them as your pre-flight checklist before taking any dorsiflexion reading.
- Same Landmarks, Every Time: Before you pick up a tool, mentally (or physically) mark your anatomical landmarks. Whether it's the lateral malleolus, the fibular head, or the fifth metatarsal, use the exact same points for every single measurement.
- Uniform Pressure: During passive tests, the amount of overpressure you apply can significantly alter the reading. Develop a feel for a consistent, gentle force that takes the joint to its true end-range without causing discomfort or compensation.
- Stick to One Device: If you measure a patient's baseline with a digital inclinometer, use that same inclinometer for all follow-up assessments. Switching between a tape measure, a goniometer, and an app introduces variability that is not related to the patient's actual progress.
By embedding these three habits into your workflow, you create a system that isolates the one variable you want to measure: the patient's true range of motion. For a deeper dive, explore our complete guide on how to measure range of motion.
Decoding the Reliability Metrics
When you start digging into the research, you will encounter a few key statistical terms. They might seem academic, but they have direct, practical implications for your clinical decisions.
The two most important metrics for a clinician are the Intraclass Correlation Coefficient (ICC) and the Minimal Detectable Change (MDC). The ICC tells you how reliable a tool is, while the MDC tells you how much change is needed to be sure it's not just error.
Understanding these values helps you pick the right tool for the job. A high ICC (closer to 1.0) means the tool gives consistent results. A low MDC means you can detect smaller, clinically meaningful changes with confidence.
Choosing Your Tool Based on Evidence
So, which tool should you trust? The literature provides a fairly clear picture. A key diagnostic study from 2012 compared three common weight-bearing measures and found that both the distance-to-wall test and a digital inclinometer showed near-excellent reliability, with ICC values reaching 0.96 to 0.99. The standard goniometer was slightly less consistent, with ICCs between 0.85 and 0.96 (3).
This tells us that for functional tests, the inclinometer and tape measure are often superior choices.
The same research highlighted that the inclinometer and distance-to-wall methods also had a small Minimal Detectable Change (MDC). This is significant. It means a change of just a few degrees or millimetres is likely a true physiological improvement, not just measurement noise. When precision is critical, these details matter.
To make it simple, here is how the tools stack up based on the evidence.
Tool Reliability Comparison for Weight-Bearing Measurement
Research provides a clear hierarchy when it comes to the reliability of common tools for measuring weight-bearing dorsiflexion. The data consistently shows that while all are useful, some offer higher precision.
| Measurement Tool | Typical ICC Range | Key Advantage | Source |
|---|---|---|---|
| Digital Inclinometer | 0.96 – 0.99 | High precision and direct angular readout, reducing interpretation error. | Konor et al. (2012) (3) |
| Distance-to-Wall | 0.96 – 0.99 | Extremely simple, highly accessible, and exceptionally reliable for screening. | Konor et al. (2012) (3) |
| Standard Goniometer | 0.85 – 0.96 | Widely available but more prone to alignment errors during dynamic tests. | Konor et al. (2012) (3) |
This comparison shows that digital tools and simple linear measurements often outperform traditional goniometry in dynamic, weight-bearing scenarios.
Ultimately, the best tool is the one you can use consistently and confidently. By pairing a reliable instrument with a standardised protocol, you ensure your assessments are not only accurate on day one but are also reproducible throughout the entire course of care. This commitment to precision is what transforms a simple measurement into a powerful driver of clinical outcomes.
Documenting and Interpreting Your Findings for Better Outcomes
Getting a precise measurement is an excellent start, but it is only half the battle. The real clinical value comes when you translate those numbers into a clear, actionable game plan for your patient. A systematic approach to documenting and interpreting dorsiflexion is what turns a simple assessment into a powerful tool for better outcomes.
Think of your documentation as the detailed, chronological story of your patient's recovery. It is not just for your own records; it is a robust justification for your clinical decisions and a clear narrative of progress for the patient and any other providers involved in their care. Incomplete notes lead to missed opportunities, but meticulous records transform a number into a compelling clinical story.
Creating a Complete Clinical Record
Your clinical notes need to paint the whole picture. Simply jotting down a number is not sufficient. For a record to be truly useful later on, it needs context.
Here is what should be included in every single entry:
- The Basics: Always start with the date and clearly note the side being tested (e.g., Left or Right). This is simple, but easy to forget in a busy clinic.
- The Measurement: Record the exact value with its specific units. Was it 38 degrees from your inclinometer or 11 cm from the distance-to-wall test?
- The Test Protocol: Be specific about how you measured. Documenting "WBLT (Half-Kneeling)" is infinitely more useful than a vague "dorsiflexion check."
- Qualitative Observations: This is where your clinical eye comes in. Make a note of patient-reported symptoms like a "sharp pinch in the front of the ankle" or compensations you observed, such as "moderate foot pronation at end-range."
This level of detail is invaluable. When you review your notes in two weeks, you will know exactly what you did, what you found, and what the patient was feeling at that moment.
Turning Numbers into Clinical Insights
Once you have a complete record, you can start connecting the dots. Interpretation is where you bridge the gap between the objective measurement and your patient's real-world complaints. This comes down to asking the right questions.
First, how does this number compare to established norms? Knowing an active individual has only 25 degrees of weight-bearing dorsiflexion when norms suggest they should be closer to 40 degrees immediately flags a significant limitation. When you are documenting a series of measurements over time, using some basic statistical methods for summarizing findings can help you see trends and the range of their results more clearly.
Next, you must look for asymmetry. A meaningful difference between the left and right sides—often anything greater than 2-4 degrees—can be a major clue. It frequently points to a unilateral issue that might be driving a compensatory movement pattern elsewhere. A runner with right knee pain who also has 5 degrees less dorsiflexion on that side is a classic example often seen in clinical practice.
The ultimate goal is to link the objective finding directly to the patient's functional problem. If a patient complains of difficulty squatting deep and you measure a 10 cm deficit in their lunge test, you have found a direct, treatable link between their impairment and their functional limitation.
Finally, let these insights guide your goal-setting. A well-defined goal is not just "improve dorsiflexion." A great goal is: "Increase right WBLT from 32 degrees to 40 degrees in 4 weeks to enable a pain-free parallel squat." This approach makes progress tangible, keeps your patient engaged, and focuses your treatment on what truly matters—getting them back to doing what they love.
Burning Questions on Dorsiflexion Measurement
As you become more comfortable with these measurements, a few questions commonly arise in the clinic. These have been asked by students, new graduates, and even seasoned therapists trying to refine their process. Getting these details right is what separates a good assessment from a great one.
Let's clarify some of the most common points of confusion.
What’s Actually Considered “Normal” Ankle Dorsiflexion?
This is a frequently asked question. While "normal" is always relative to the individual, we have solid benchmarks to guide our clinical reasoning.
For a functional, weight-bearing lunge, a range of 35–40 degrees is generally considered necessary to perform most activities like squatting, running, or descending stairs without compensation (1).
If you are using the distance-to-wall method, a practical goal is clearing 10–12 cm (about 4–5 inches) between the big toe and the wall, while keeping the heel firmly on the floor (2). This is a quick, reliable indicator of functional mobility.
In non-weight-bearing assessments, the values differ.
- With the knee straight (which tensions the gastrocnemius), a passive range of 0–10 degrees is considered typical.
- When the knee is bent to 90 degrees, taking the gastrocnemius out of the equation, that number should increase to around 20 degrees. This position better isolates the soleus and the talocrural joint itself (1).
Remember, these are guidelines. The true definition of "normal" is whatever that individual needs to achieve their goals, pain-free.
Why Are My Weight-Bearing and Non-Weight-Bearing Results So Different?
If you see a large gap between these two numbers, do not assume an error. This discrepancy is a critical piece of the clinical puzzle, as each test provides unique information.
The weight-bearing test reveals functional dorsiflexion. It is the end result of joint arthrokinematics, tissue extensibility, neuromuscular control, and strength all working together under bodyweight load. It shows what the person can actually use.
Conversely, the non-weight-bearing test assesses pure, passive range. By removing body weight and active muscle control, we get a clearer picture of the joint's available capacity.
So, what does a discrepancy mean? If a patient has ample passive range that disappears under load, you should consider motor control deficits, strength limitations, or perhaps fear avoidance. However, if both measurements are equally restricted, your investigation should pivot toward a true talocrural joint restriction, such as capsular tightness or a bony block.
Which Tool Is Best: Goniometer, Inclinometer, or Tape Measure?
This is an excellent practical question. It really boils down to the reliability of the tool for the specific job at hand.
When it comes to the weight-bearing lunge test, the research is surprisingly clear. Both a digital inclinometer and a simple tape measure (for the distance-to-wall method) consistently outperform a standard goniometer in reliability. Studies report intraclass correlation coefficient (ICC) values that are often in the excellent 0.96 to 0.99 range for these tools (3).
The main takeaway is that for a dynamic, loaded test like the WBLT, simpler tools often provide greater reliability. A tape measure is incredibly consistent and accessible—perfect for a quick screen. A digital inclinometer gives a direct, precise angular reading that is excellent for documentation and tracking progress over time.
The traditional plastic goniometer, a staple in every clinic, can be somewhat clumsy to align consistently while the patient is in a lunge. This can introduce more variability and lead to slightly lower reliability. At the end of the day, the best tool is the one you can use confidently and consistently every single time.
References
- Macrum E, Bell DR, Boling M, Lewek M, Padua D. Effect of limiting ankle-dorsiflexion range of motion on lower extremity kinematics and muscle-activation patterns during a squat. Journal of Sport Rehabilitation. 2012;21(2):144-50.
- Bennell KL, Talbot RC, Wajswelner H, Techovanich W, Kelly DH, Hall AJ. Intra-rater and inter-rater reliability of a weight-bearing lunge measure of ankle dorsiflexion. Australian Journal of Physiotherapy. 1998;44(3):175-80.
- Konor MM, Morton S, Eckerson JM, Grindstaff TL. Reliability of three measures of ankle dorsiflexion range of motion. International Journal of Sports Physical Therapy. 2012;7(3):279-87.
- Hall EA, Chomistek AK. Normative anke dorsiflexion range of motion in college-aged men and women. International Journal of Athletic Therapy and Training. 2018;23(5):203-7.
- Gabbe BJ, Finch CF, Wajswelner H, Bennell KL. Predictors of lower extremity injuries in community-level Australian football. Clinical Journal of Sport Medicine. 2004;14(2):56-63.
- Moseley AM, Crosbie J, Adams R. Normative data for passive ankle plantar-dorsiflexion-flexion flexibility. Australian Journal of Physiotherapy. 1991;37(2):99-105.
- Vereeck L, Wuyts B, Truijen S, Van de Heyning P. Clinical assessment of the vestibulocollic reflex: A comparison of the caloric test and the cervical vestibular-evoked myogenic potential. Acta Oto-Laryngologica. 2008;128(9):972-8.
At Meloq, we believe that objective data is the foundation of exceptional care. Our suite of digital measurement tools, including the EasyAngle digital goniometer and inclinometer, is designed to help you replace subjective assessments with precise, reliable data. Empower your clinical decisions and track patient progress with confidence by visiting https://www.meloqdevices.com.

Featured Product
EasyAngle Digital Goniometer
Measure range of motion with clinical precision. CE certified, Bluetooth connected.
Learn More