
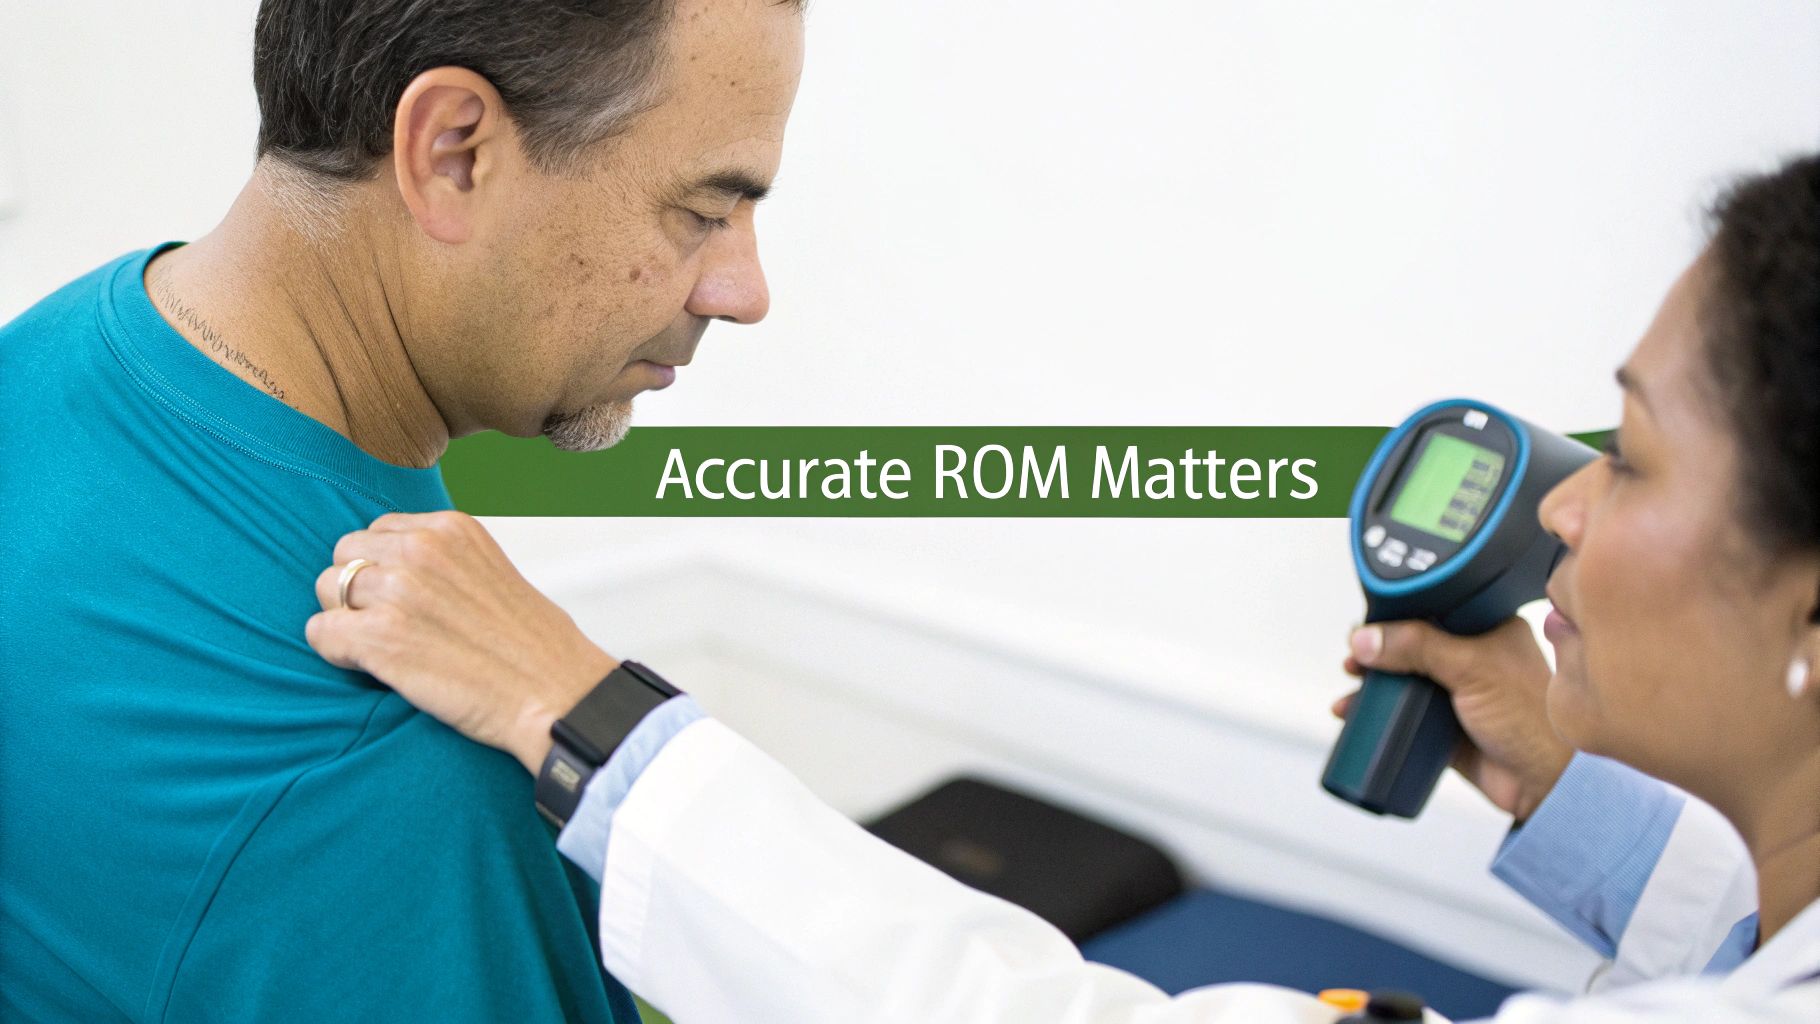
A Clinician's Guide to Accurately Test Range of Motion
Team Meloq
Author
Understanding a patient's physical condition begins with the fundamentals. Testing range of motion is a foundational clinical skill. It is not merely about observing how far a joint can move; it is about performing a standardized, objective assessment with a reliable tool, such as a goniometer, to obtain quantifiable data about a specific joint's function. This information forms the bedrock of any solid diagnosis, treatment plan, or progress report for those working in physical therapy or sports performance.
Why Accurate Range of Motion Testing Is Non-Negotiable
In a busy clinical setting, it is easy to feel pressure to speed through assessments. However, when it comes to range of motion (ROM) testing, precision is paramount. These measurements directly shape patient outcomes, whether setting recovery goals after surgery or making a difficult return-to-sport decision.
Obtaining objective, repeatable data does more than just sharpen clinical reasoning. It is how clinicians build trust with patients and create solid documentation for insurance purposes. When a patient sees their progress quantified in degrees, their engagement and commitment to their rehabilitation program often increase.
The Foundation: Active vs. Passive ROM
Before meaningful data can be gathered, it is crucial to be clear on the difference between active and passive range of motion. Each provides a unique window into the patient's condition, helping to pinpoint the source of their limitation.
A significant part of the initial assessment is determining if a limitation originates from the joint itself (a capsular issue), the muscles and nerves controlling it, or simply from pain. Distinguishing between active and passive motion is the first step in solving that puzzle.
Active vs. Passive ROM: What Your Assessment Reveals
| Assessment Type | What It Measures | Primary Indication | Common Limitation Source |
|---|---|---|---|
| Active ROM (AROM) | The patient's ability to move a joint using their own muscles. | Functional strength, coordination, and willingness to move. | Muscle weakness, pain, poor motor control, or nerve issues. |
| Passive ROM (PROM) | The true available motion of a joint when moved by the clinician. | Joint integrity, ligamentous stability, and tissue extensibility. | Joint capsule tightness, bony block, or soft tissue restriction. |
If you find a significant gap between what a patient can do on their own (AROM) and what you can achieve for them (PROM), it is a major clue. It often points to issues like muscle weakness or pain inhibition rather than a true mechanical block in the joint. This distinction is absolutely critical for an accurate diagnosis.
Accurate ROM testing is vital not only for injury assessment but also to help athletes, for example, to enhance athletic performance. The data gathered informs everything from targeted mobility work to strength programming.
The Growing Demand for Precision
The push for objective data is reflected in market trends. According to one market analysis, the global goniometer market was valued at USD 9.3 million in 2022 and is projected to reach USD 13.8 million by 2032, growing at a compound annual growth rate (CAGR) of 4.9% (1).
This trend may be influenced by the growth in rehabilitation facilities and expanding insurance coverage for physical therapy services. For a deeper look into why this kind of data is so important, check out this guide on the objective of measurement.
Setting the Stage for Reliable ROM Measurement
Any experienced clinician knows that a successful range of motion test begins long before a goniometer ever touches the patient. The recorded numbers are only as good as the setup. An improper setup can lead to inaccurate data.
Think of it like a scientific experiment—the more variables controlled, the more trustworthy the results. This means standardizing everything from the tools used to the way the patient is positioned and instructed. A rushed, casual approach can lead to inconsistent numbers that do not paint an accurate picture of a patient's progress or limitations.
Choosing Your Tools Wisely
The selected instrument is the foundation for accuracy. While the traditional plastic or metal universal goniometer is a staple in most clinics, its reliability is notoriously dependent on the user's skill. Aligning the arms and reading the scale while a patient holds a position can be challenging and may introduce errors. Studies have shown that inter-rater reliability—achieving the same measurement between different clinicians—can be a significant challenge (2).
This is where modern digital devices can offer advantages. Digital goniometers are designed to minimize these user-dependent errors. They provide a clear digital readout and often include features like inclinometers, which can significantly boost both inter-rater and intra-rater (same clinician) reliability. The goal is to capture the joint's true motion, not the subtle inconsistencies in measurement technique. For a deeper dive into what is available, you can explore some of the different range of motion measurement tools available today.
The Critical Role of Patient Positioning and Communication
Once a tool is selected, the next step is placing the patient in the correct position. Every joint measurement has a standardized position for a reason: it isolates the specific movement and prevents the patient from compensating. An improperly positioned patient might engage other muscles or joints to "cheat" the movement, yielding an inflated and inaccurate reading.
Clear, simple communication is just as vital. Straightforward instructions are needed to get a true, maximal effort during active ROM testing.
- Use simple commands: Instead of a clinical phrase like, "I need you to perform shoulder flexion," try, "Lift your arm straight out in front of you as high as you can."
- Explain the why: A quick explanation of what you are measuring can help with cooperation and ensure the patient understands the goal.
- Encourage, don't force: Especially during passive testing, maintain communication throughout the movement to check for pain or resistance. It’s a partnership.
The consistency of your setup is the bedrock of longitudinal tracking. If you measure a patient's knee flexion in a seated position one day and supine the next, you aren't comparing apples to apples. The data will be completely misleading.
Identifying Anatomical Landmarks with Precision
The final piece of the setup puzzle is finding bony landmarks. A goniometer is only as good as its alignment. The fulcrum (axis), stationary arm, and moving arm must be placed precisely over specific anatomical points to measure the joint angle correctly. If the placement is off, the measurement will be off.
Let's take a real-world example: testing knee flexion on a patient who is a few weeks post-ACL reconstruction. The setup must be meticulous every single time.
- Positioning: First, place the patient in a supine position (on their back). This ensures the hip stays in a neutral position and does not influence the knee's movement.
- Landmarking: Next, palpate to find the key spots: the lateral epicondyle of the femur (for the fulcrum), the greater trochanter of the femur (for the stationary arm), and the lateral malleolus of the fibula (for the moving arm).
- Instruction: Finally, ask the patient to actively bend their knee by sliding their heel toward their glute, keeping a close eye for any compensatory hip movement.
By following this exact protocol every time, you can be more confident that a 5-degree improvement in knee flexion is a genuine gain, not just a procedural artifact. This level of precision is non-negotiable for making sound clinical decisions.
Mastering Goniometry Across Major Joints
Translating theory into practice is where a clinician's skill truly shines. Accurately using a goniometer across different joints is not just about knowing the numbers; it is about mastering a repeatable process that makes data both reliable and clinically meaningful. This goes beyond simply aligning the device—it demands a solid understanding of patient positioning, proper stabilization, and anatomical landmarking to isolate the exact motion you want to measure.
Each joint presents its own unique challenges. A successful test range of motion for a shoulder is a completely different endeavor than measuring a knee or hip. The goal is to move beyond simply knowing how to measure and start understanding why certain steps are so critical for getting a pure, uncompensated measurement.
This process flow simplifies the procedure into three core actions that form the foundation of any reliable ROM setup.
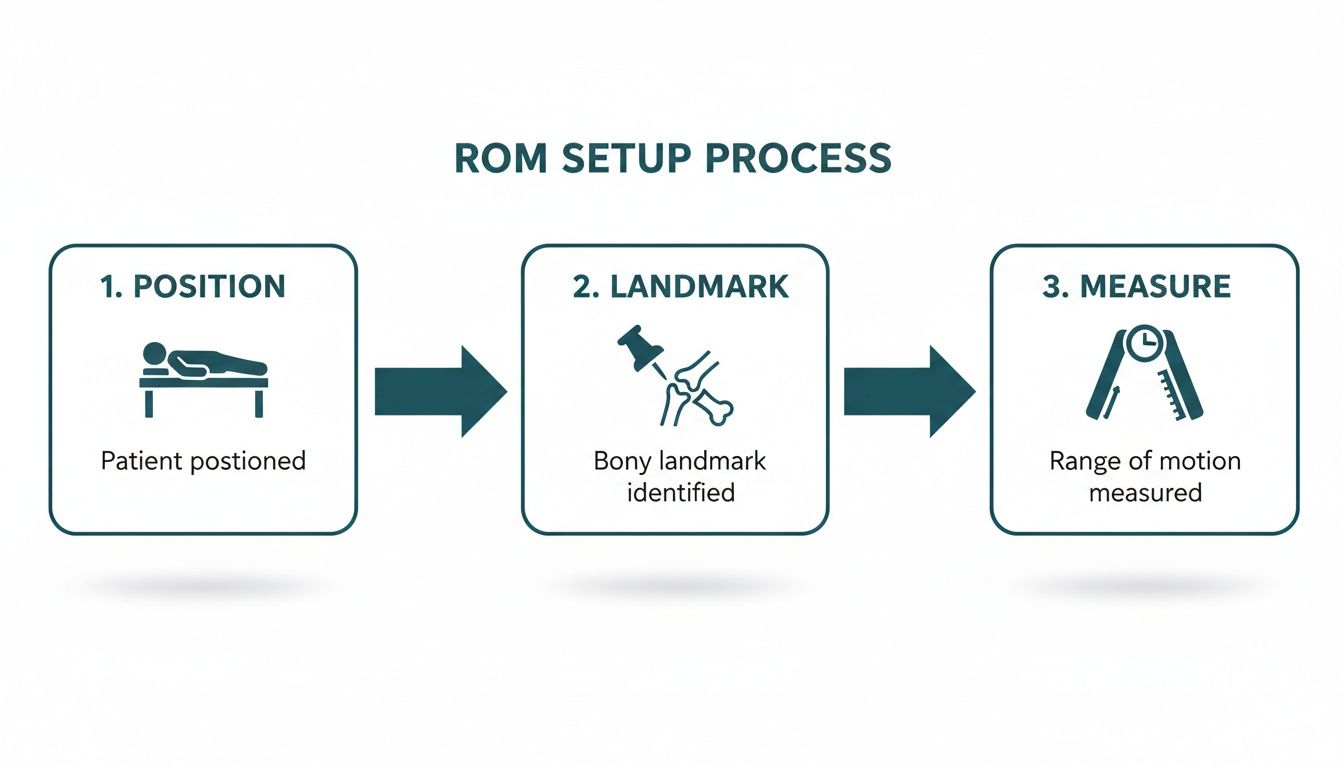
As the visual shows, consistent positioning and precise landmarking are the non-negotiables. Getting these right sets the stage for an accurate measurement.
The Intricacies of Shoulder Measurement
The shoulder complex, with its incredible mobility, is notoriously difficult to measure accurately. That freedom of movement comes from the delicate interplay between the glenohumeral joint and the scapulothoracic articulation. The secret to a good shoulder ROM test is isolating glenohumeral motion by stabilizing the scapula.
Consider this: when measuring shoulder flexion, if the scapula is not stabilized, the patient can easily compensate for limited movement by arching their back or shrugging their shoulder girdle. This yields an inflated reading that does not reflect the true capacity of the glenohumeral joint.
To perform a proper shoulder flexion test, these steps are recommended:
- Positioning: Have the patient lie supine with their arm in a neutral position by their side. This minimizes the effect of gravity and helps relax surrounding muscles.
- Stabilization: Place one hand firmly over the top of the acromion and clavicle. This is a critical step to prevent scapular elevation.
- Landmarking: The goniometer's fulcrum is placed over the lateral aspect of the greater tubercle of the humerus. The stationary arm aligns with the midaxillary line of the thorax, and the moving arm follows the humerus.
A common error is allowing the patient to externally rotate their arm as they flex it. This can "unlock" the joint and provide a few extra degrees, but it is a compensatory pattern that masks true flexion. Always maintain the arm in neutral rotation.
Shoulder ROM measurement has long been a challenge in rehabilitation because traditional goniometry can be subjective. Thankfully, digital tools are changing the game. New devices using IMU sensors and digital goniometers have demonstrated impressive inter-tester reliability. Some studies report very small measurement biases when compared against gold standards. You can delve into the research on digital goniometer accuracy to see just how precise these tools have become.
Precision at the Hip and Knee
The lower extremities, especially the hip and knee, are foundational for functional movements like walking, climbing stairs, and squatting. These joints are more constrained than the shoulder, but compensatory movements from the pelvis and lumbar spine can easily skew findings if not carefully observed.
When measuring hip flexion, the biggest factor to watch for is posterior pelvic tilt. As the patient brings their knee toward their chest, their low back might flatten against the table, incorporating lumbar flexion into the measurement.
- Positioning: The patient should be supine with both legs extended.
- Stabilization: Place your hand on the anterior superior iliac spine (ASIS) to feel for any pelvic rotation or tilt.
- Landmarking: The fulcrum is over the greater trochanter. The stationary arm aligns with the midaxillary line of the pelvis, while the moving arm tracks the femur toward the lateral femoral epicondyle.
The knee is generally more straightforward, but precision still matters, especially in post-operative cases where every degree counts. For knee flexion, the supine position is standard. The key landmarks—greater trochanter, lateral femoral epicondyle, and lateral malleolus—provide a clear alignment path. If you're new to the tool itself, taking a moment to understand what a goniometer is and how its parts work is a great first step.
Assessing the Complex Movements of the Spine
Spinal ROM is a different beast altogether. You are not measuring a simple hinge or ball-and-socket joint but the cumulative motion of multiple vertebral segments. For this, inclinometers or specialized spinal goniometers are often far more reliable than a standard universal goniometer.
For lumbar flexion, the double inclinometer technique is a trusted method.
- Placement: Place one inclinometer over the T12-L1 junction and zero it. Place a second one over the S1-S2 junction and zero it as well.
- Movement: Have the patient bend forward as far as they comfortably can.
- Calculation: The total lumbar flexion is the reading from the top inclinometer minus the reading from the bottom one. This method effectively subtracts the hip flexion contribution, isolating the lumbar spine's true range.
Contextualizing Your Findings with Normative Data
A measurement is just a number until it is put into context. Comparing findings to established normative values helps determine if a patient's range is within a typical functional limit, significantly restricted, or even hypermobile. This context allows you to set realistic goals and educate patients effectively.
However, "normal" can vary widely based on age, sex, and activity level. Normative data should be used as a guideline, not an absolute rule. The most important comparison is always against the patient's own baseline and their contralateral (unaffected) side.
Normative ROM Values for Major Joints in Adults
The table below offers a quick reference for average ROM values in healthy adults, based on established physiotherapy and orthopedic literature (3,4). It serves as a handy starting point for putting measurements into perspective.
| Joint | Movement | Average Range of Motion (Degrees) |
|---|---|---|
| Shoulder | Flexion | 0-180° |
| Abduction | 0-180° | |
| Internal Rotation | 0-70° | |
| External Rotation | 0-90° | |
| Hip | Flexion | 0-120° |
| Extension | 0-30° | |
| Abduction | 0-45° | |
| Knee | Flexion | 0-135° |
| Extension | 0° | |
| Spine (Lumbar) | Flexion | 0-60° |
| Extension | 0-25° |
By mastering these joint-specific techniques and consistently referencing normative data, you can elevate your ability to test range of motion from a simple measurement to a powerful diagnostic and progress-tracking tool. This disciplined approach ensures that clinical decisions are built on a foundation of accurate, objective data.
Turning Measurements Into Meaningful Insights
Collecting precise range of motion data is only half the battle. The real clinical skill lies in translating those numbers into a meaningful story about a patient's condition.
"110 degrees of knee flexion" on its own is just a data point.
However, knowing that this number represents a 15-degree improvement from last week—yet remains 25 degrees shy of their uninjured side—is an insight that drives the next steps in treatment. This is where expertise transforms raw data into a clear plan, spotting subtle clues that hint at the underlying pathology.
Decoding the Discrepancies
One of the most powerful diagnostic clues comes from comparing active range of motion (AROM) to passive range of motion (PROM). The gap, or lack thereof, between these two values can reveal much about the source of a limitation.
- When AROM is significantly less than PROM: This often points toward issues with muscle activation rather than a mechanical block. The joint can move, but the patient cannot achieve the motion on their own. This could signal muscle weakness, pain inhibition, or poor neuromuscular control.
- When AROM and PROM are equally limited: This pattern usually suggests a problem with the joint structure itself, such as capsular tightness (e.g., adhesive capsulitis), a bony obstruction, or a significant soft tissue restriction that physically blocks movement.
Here’s a simple way to think about it: PROM indicates what the joint is capable of. AROM shows what the patient’s system can currently produce. The difference between these two numbers is often where the most valuable clinical answers are found.
A crucial takeaway is to always look beyond the primary joint. For instance, a patient struggling with shoulder abduction might be compensating with excessive scapular elevation. Observing these compensatory patterns is just as important as the goniometer reading itself.
The Power of Precise and Efficient Documentation
Clear and concise documentation is non-negotiable. It creates a defensible record of a patient's journey, justifies the treatment plan, and ensures continuity of care.
This is an area where digital tools have significantly changed the process. Manual documentation can be time-consuming and prone to human error. Modern digital goniometers, on the other hand, can sync directly with Electronic Medical Records (EMRs), saving valuable time and eliminating transcription mistakes.
Evidence supports the accuracy of these tools. A systematic review of digital ROM tools found a pooled mean bias of just −0.25 degrees compared to manual goniometers, suggesting they can match gold-standard accuracy while reducing measurement variability (5). This is further supported by studies showing these devices deliver repeatable results across joints, with inter-rater reliability often exceeding 0.95 correlation coefficients (5).
But these systems do more than just record numbers. Many can generate visual progress reports, like graphs and charts. Showing a patient a graph of their progress can be an incredibly powerful motivator, boosting their engagement and adherence to their treatment program.
For more practical tips, you might be interested in this guide on how to document range of motion effectively. By turning abstract numbers into actionable insights and clear visuals, you empower both yourself and your patients.
Adapting Your Technique for Special Populations
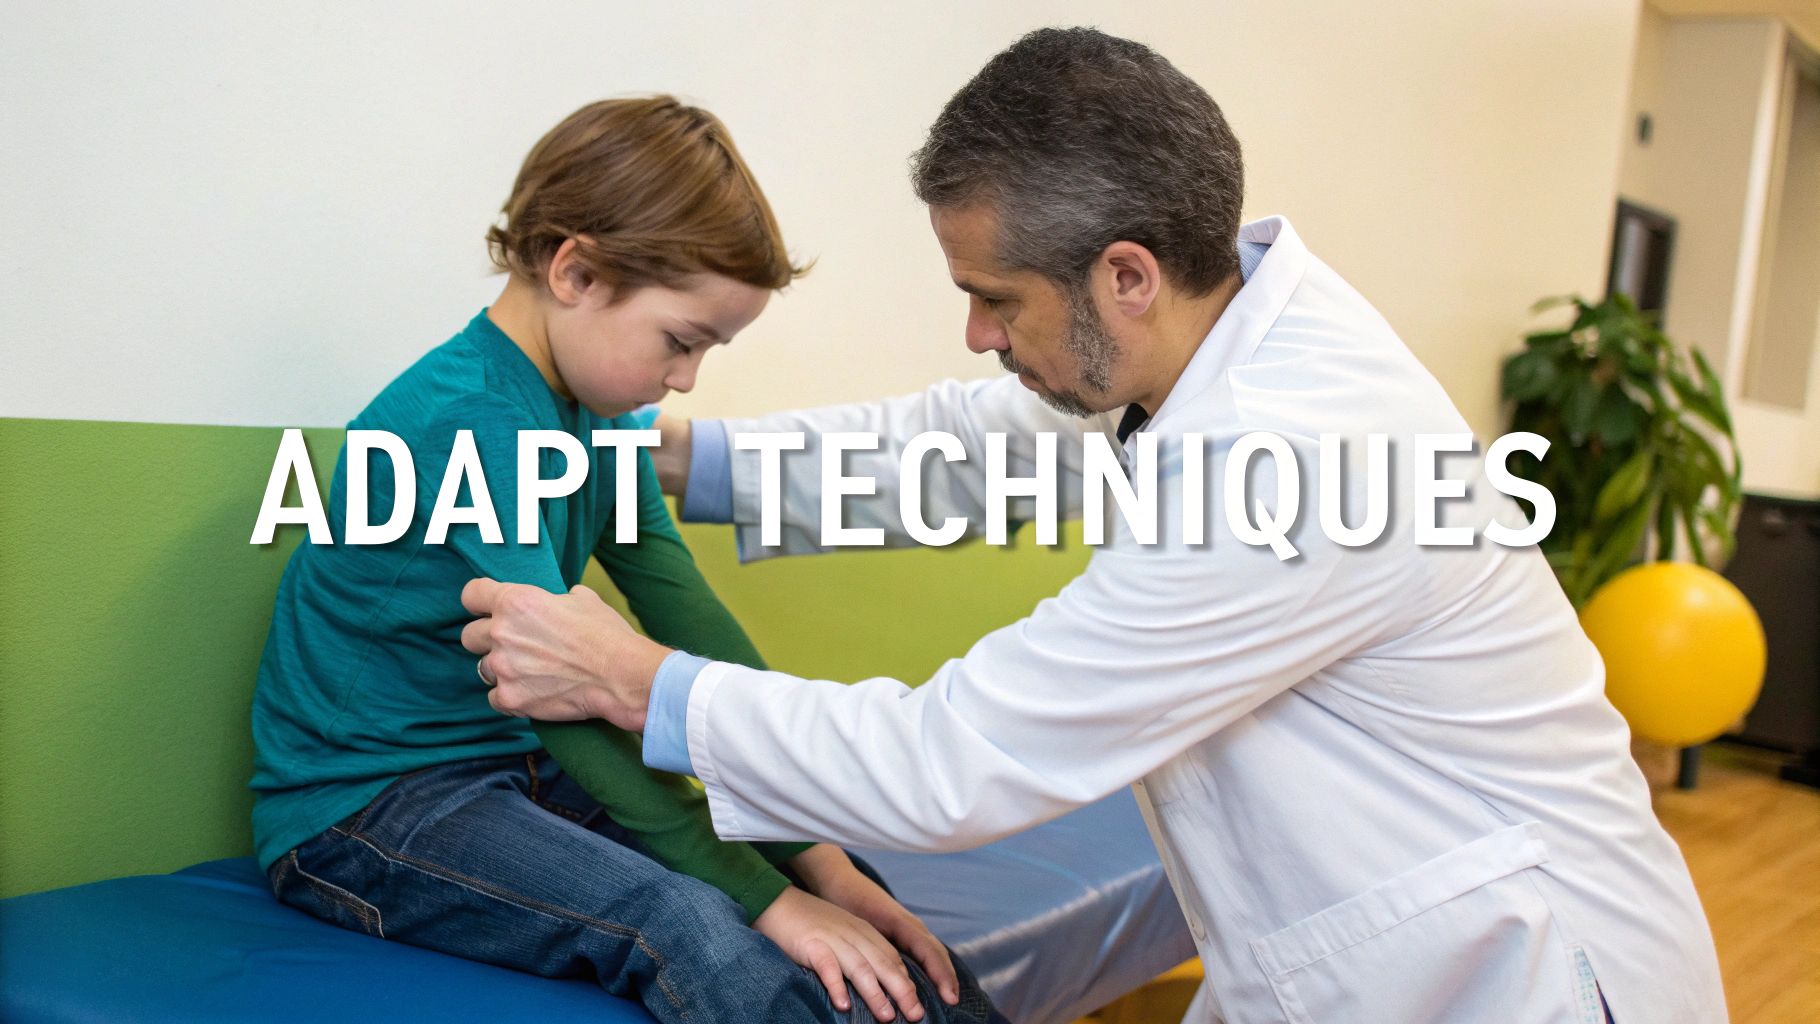
Standard protocols are the foundation of good measurement, but the art of clinical practice is knowing when and how to adapt. Not everyone fits the textbook anatomical model, and to safely test range of motion across diverse populations, flexibility is key.
This means being able to identify situations that call for caution and adjusting your approach for clients who cannot follow standard instructions—whether due to age, development, or even species. A rigid, one-size-fits-all mindset is not just ineffective; it can be dangerous.
Contraindications and Necessary Precautions
Before touching a patient, the first thought must be safety. Certain conditions demand that you either modify your technique or skip ROM testing entirely. Overlooking these red flags can cause further injury or exacerbate an existing condition.
It is absolutely critical to screen for these issues. Think of them less as suggestions and more as non-negotiable checkpoints to protect your patient.
Key situations that demand caution include:
- In the region of a dislocation or unhealed fracture: Passive ROM is almost always contraindicated, as it can disrupt the healing process (3).
- Immediately following surgical procedures: Always follow the surgeon's post-operative protocol to the letter. Movement will be restricted for a reason—to protect repaired tissues.
- Presence of myositis ossificans or ectopic ossification: Be extremely cautious. Aggressive passive stretching may worsen this condition, where bone tissue forms inside muscle (4).
When in doubt, start with gentle active range of motion. It lets the patient control the movement within their own pain-free limits. You will still get valuable information without taking unnecessary risks.
Assessing Pediatric Patients
Working with children is a completely different domain. Their bodies are still growing, and their ability to cooperate can change in a heartbeat. A successful pediatric assessment hinges less on rigid instructions and more on creativity, patience, and keen observation.
For example, instead of asking a toddler to "lift your arm," you might make it a game: "Can you reach for this toy?" This simple switch turns a clinical test into playtime, which usually elicits a more natural and maximal effort.
Unique Considerations for Children
Anatomical differences are a huge factor. Children naturally have more joint laxity and different "normal" ranges than adults do (6). Applying adult normative data to a child can lead to misinterpretation.
- Establish their baseline: Always assess the uninvolved side first. This shows you what "normal" looks like for that specific child.
- Use visual estimation and functional tasks: Getting a precise goniometer reading on a squirming toddler can be challenging. Instead, observe them performing age-appropriate tasks. This can provide excellent functional data.
- Keep it brief and engaging: A child's attention span is fleeting. Plan your assessment to be quick, efficient, and as fun as possible.
Adapting ROM Testing for Canine Rehabilitation
The principles of goniometry are not just for humans. In the growing field of veterinary rehabilitation, assessing joint motion in dogs is crucial for tracking recovery from orthopedic surgeries like a TPLO (tibial-plateau-leveling osteotomy) or managing chronic issues like osteoarthritis.
Just like with people, proper positioning and landmarking are everything, but the anatomical points are different. The most commonly measured joints in dogs are the stifle (knee), hip, and elbow.
When measuring stifle flexion and extension, for instance, the dog is usually positioned in lateral recumbency (lying on its side).
Landmarks for Canine Stifle ROM:
- Fulcrum: Placed over the stifle joint's axis of rotation.
- Stationary Arm: Aligned with the femur, pointing toward the hip's greater trochanter.
- Moving Arm: Aligned with the tibia, pointing toward the lateral malleolus of the hock (ankle).
Since a dog cannot be given verbal instructions, the assessment is entirely passive. A gentle but confident touch is needed to guide the limb through its range, feeling for the end-feel and watching for any signs of discomfort like muscle tensing or pulling away. Research has shown that goniometry in canines is a reliable way to quantify joint motion when performed by a skilled practitioner (7), making it an invaluable tool for animal physiotherapy.
References
- Zion Market Research. Global Goniometer Market Size, Share, & Industry Analysis by 2032. Zion Market Research. Published 2024. Accessed September 10, 2024.
- Gajdosik RL, Bohannon RW. Clinical measurement of range of motion. Review of goniometry emphasizing reliability and validity. Phys Ther. 1987;67(12):1867-72.
- Clarkson HM. Musculoskeletal Assessment Joint Range of Motion and Manual Muscle Strength. 3rd ed. Lippincott Williams & Wilkins; 2013.
- Souza TA. Differential Diagnosis and Management for the Chiropractor Protocols and Algorithms. 5th ed. Jones & Bartlett Learning; 2016.
- Keogh JWL, Cox A, Anderson S, Liew B, Olsen A, Schram B, et al. Reliability and validity of clinically accessible smartphone applications to measure joint range of motion: A systematic review. PLoS One. 2019;14(5):e0215806.
- El-Ghafour MA, El-Ghafour AA. Normal range of motion of joints of school-aged children. J Adv Med Med Res. 2017;24(6):1-10.
- Jaegger G, Marcellin-Little DJ, Levine D. Reliability of goniometry in Labrador Retrievers. Am J Vet Res. 2002;63(7):979-86.
Your Questions on Range of Motion Testing Answered
Even with the best protocols in place, questions always arise when testing range of motion in a busy clinic or performance setting. Let's tackle some of the most common ones to help sharpen your assessment skills.
How Often Should I Test ROM for a Post-Operative Patient?
This depends on the surgical protocol and the patient's stage of recovery. In the early acute stage—typically the first two to four weeks post-op—testing at every session can be incredibly valuable. It allows you to catch rapid changes like sudden stiffness or a flare-up of inflammation before they become bigger problems.
Once they move into the sub-acute and remodeling phases, formal testing may be reduced to every week or two. The key is consistency. The first measurement serves as a benchmark, and diligently tracking changes from that point guides treatment decisions and provides the objective data needed to justify ongoing care to insurers.
Remember that post-operative ROM testing is not just about collecting data. It’s an opportunity to educate your patient, manage their expectations, and celebrate small wins, which is crucial for motivation during a long recovery.
What Is the Biggest Mistake to Avoid with a Goniometer?
Hands down, the most common and critical error is failing to properly stabilize the proximal joint segment. Patients will often instinctively compensate by using adjacent joints to complete a movement if the area is not stabilized. This compensation completely inflates the ROM reading and renders the data useless.
A classic example is measuring shoulder flexion. If the scapula is not stabilized, the patient might arch their back or hike their whole shoulder girdle to gain a few extra degrees. This gives a false picture of what is actually happening at the glenohumeral joint. Always ensure the body part just proximal to the joint being measured is stabilized.
Can Smartphone Apps Reliably Test Range of Motion?
It's a mixed bag. Numerous apps are available for measuring joint angles, but their clinical reliability and accuracy can vary significantly. While some studies suggest that certain apps can be reliable if used correctly, they often lack the rigorous validation and medical device certification of dedicated digital tools (5).
Consider the variables: sensor calibration can differ wildly between phones, and guaranteeing perfect alignment on the body every time is difficult. These inconsistencies introduce errors that are unacceptable for high-stakes clinical decisions, medico-legal reports, or research. For these purposes, sticking with a validated, medical-grade digital goniometer is the recommended way to ensure measurements are precise and defensible.
Ready to swap subjective guesses for objective, repeatable data? The Meloq ecosystem, featuring tools like the EasyAngle digital goniometer and EasyForce dynamometer, gives clinicians the power to capture accurate insights with total confidence.

Featured Product
EasyAngle Digital Goniometer
Measure range of motion with clinical precision. CE certified, Bluetooth connected.
Learn More